Category: Trailer Parts Guides

  • Dump Trailer Parts Export Packing: A Checklist for Panels, Floors and Brackets
    Dump Trailer Parts Export Packing: A Checklist for Panels, Floors and Brackets

    COMPONENTS FOR CUSTOMER ASSEMBLY · QINGDAO, CHINAandywang@thyhtrailerparts.com
    Home / Blog / Dump Trailer Parts Export Packing: A Checklist for Panels, Floors and Brackets
    TRAILER PARTS / BUYER GUIDES

    Dump Trailer Parts Export Packing: A Checklist for Panels, Floors and Brackets

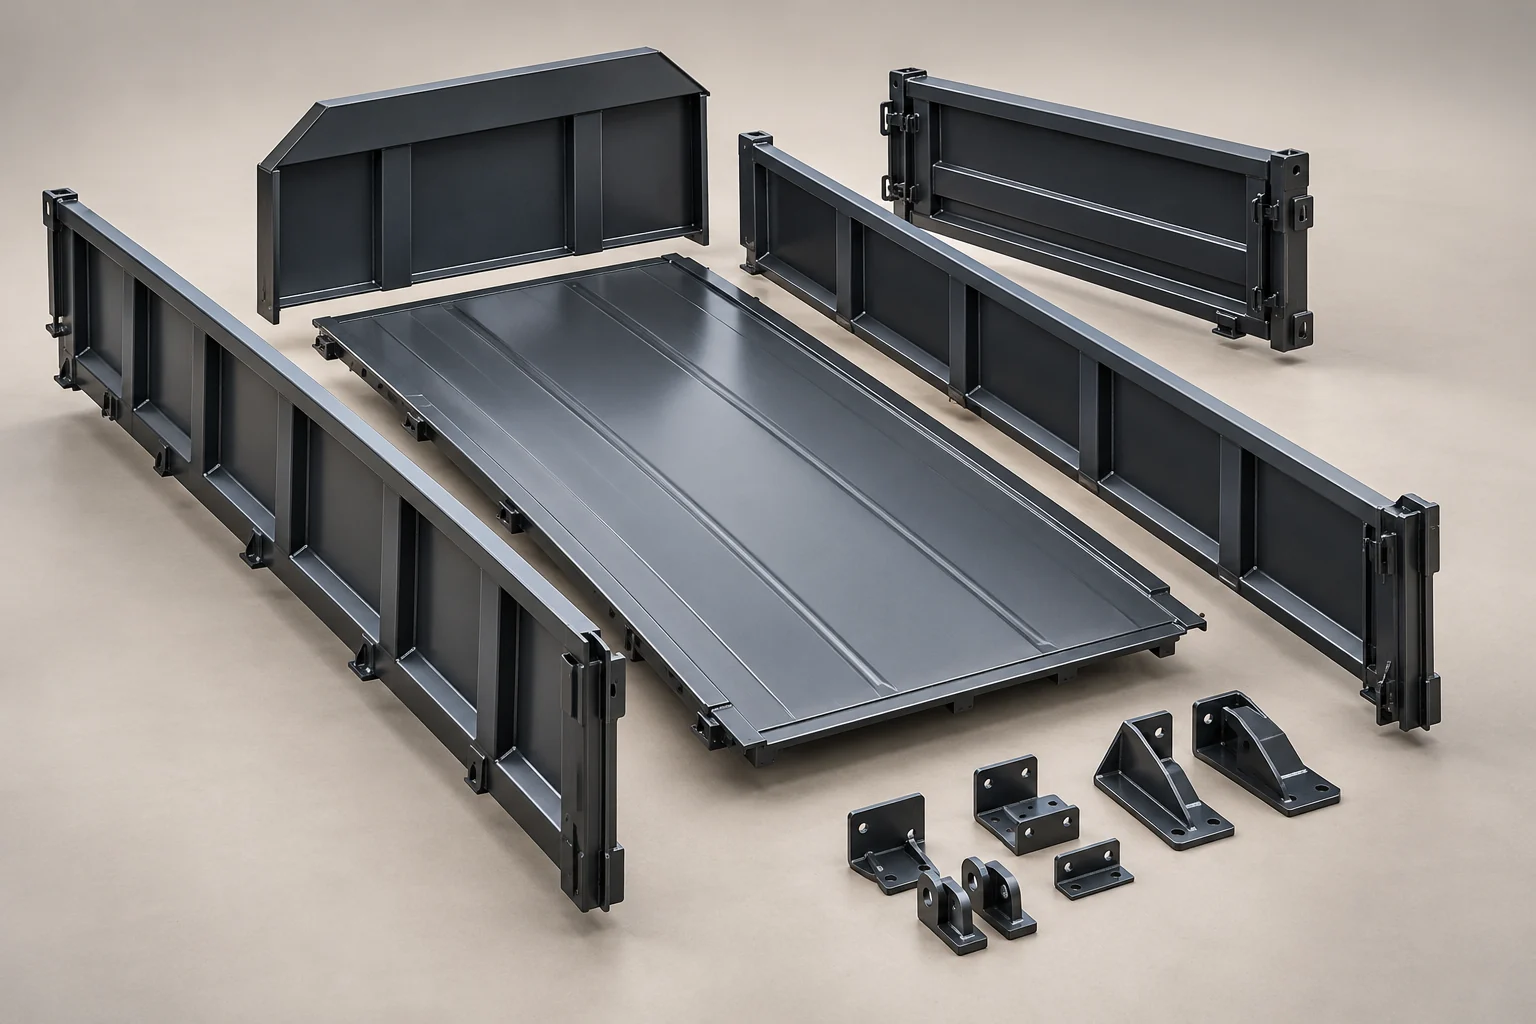
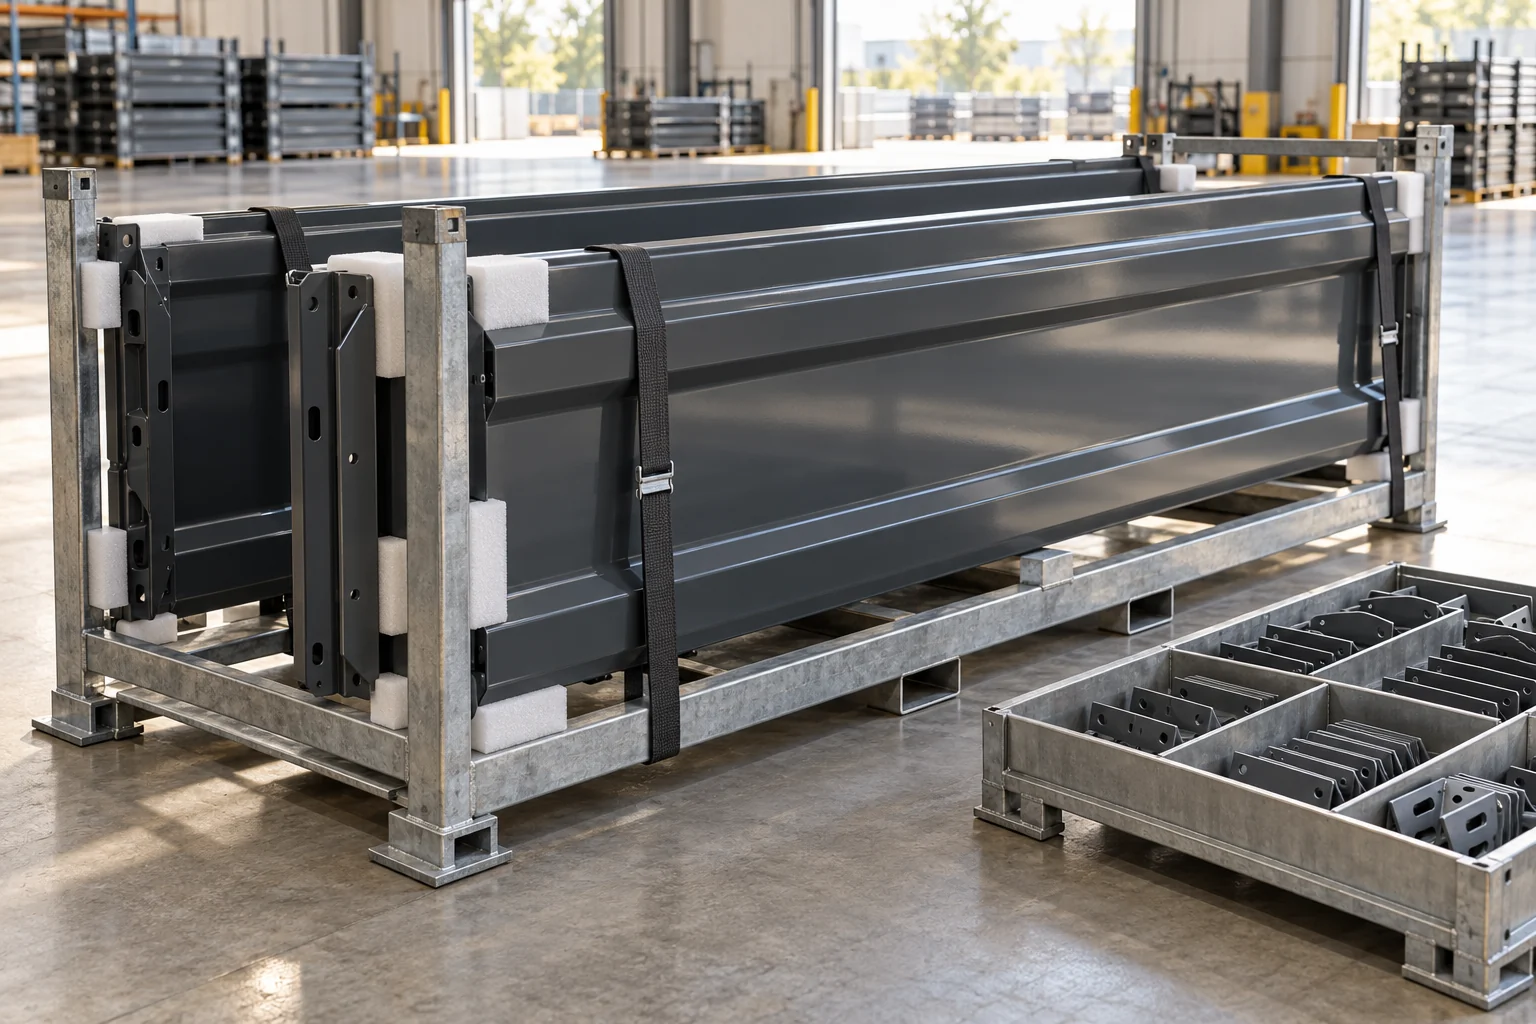
    Trailer body panels in a protective stillage with separated small brackets
    Component concept for sourcing discussion. Final geometry, material and included items follow the agreed drawings.

    Plan for the receiving process before packing begins

    Trailer components can include long side panels, broad floor fabrications, tailgates and small brackets in the same order. They need different protection and identification arrangements. A shipment that is easy to count at the supplier may still be difficult to unpack and organize at the customer’s assembly station.

    Tell the supplier how the parts will be received and stored. Will matched sets be issued to one assembly station, or will each component group enter separate inventory? Confirm the planned handling equipment and site restrictions with your logistics team. This guide is a procurement checklist for agreeing the package, not a substitute for a professionally assessed lifting or cargo-securing plan.

    Specify the protection needed by each component group

    Identify the surfaces and features most vulnerable to contact during storage and transit. A finished sidewall may need separation between visible faces; a machined bracket may need protection at a bore or contact face. State the condition the parts must reach receiving in, then ask the supplier to propose an arrangement for review.

    Component groupDetail to reviewReceiving question
    Side panels and bulkheadsSupported edges, separators and identificationCan each wall be removed and recognized?
    Floor fabricationsSupport positions and protected mating surfacesAre reference features accessible for checking?
    TailgatesProtection of hinge and latch interfacesAre interface items accounted for?
    Brackets and loose platesSeparated groups, quantities and item labelsCan small parts be reconciled without mixing?

    Discuss corrosion protection and storage duration separately from physical contact protection. Specify the intended environment and compatibility with subsequent painting, welding or assembly. Do not assume that wrapping alone delivers a defined corrosion-protection period.

    Choose component grouping deliberately

    Packing by matched trailer set can make assembly kitting easier, while packing by part family can simplify bulk inventory. Each approach has tradeoffs in package layout, access and counting. Agree the approach for the actual order rather than letting it be decided only at dispatch.

    If parts are nested, confirm how adjacent surfaces will be separated and how the packing arrangement preserves their shape. Nesting can affect package size, but a compact load is not automatically a better delivery. Any savings should be reviewed alongside handling, protection and the customer’s ability to remove the parts using the planned equipment.
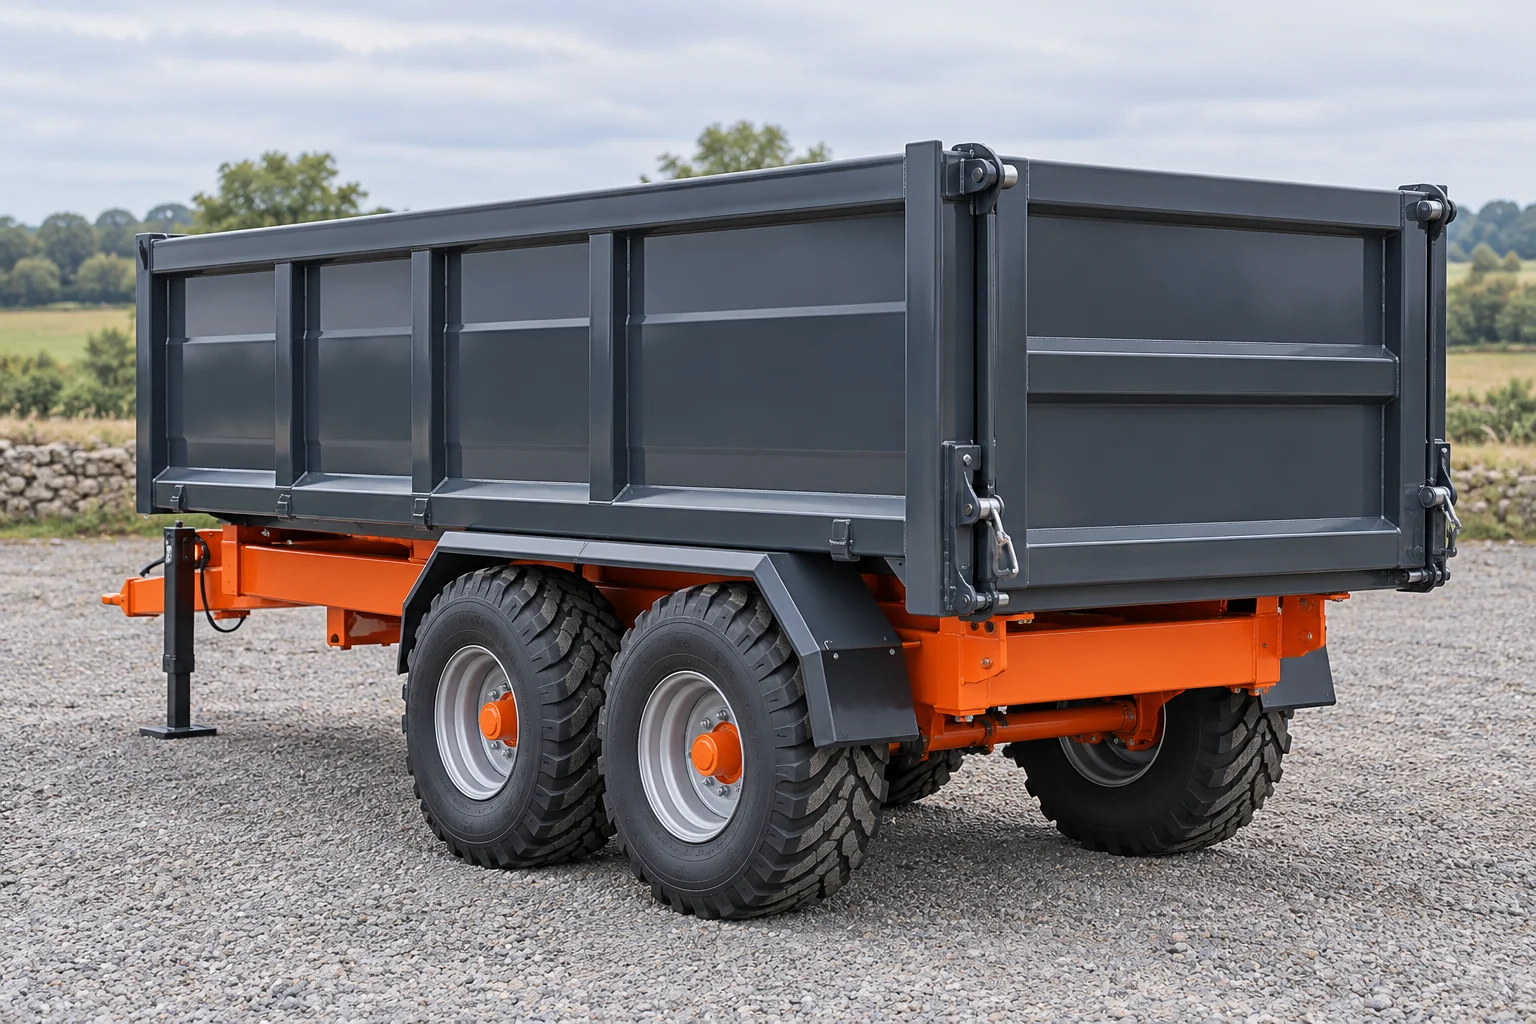
    Generic agricultural dump trailer application reference
    Application reference: agricultural / construction dump trailer. THYH supplies metal components for customer assembly, not complete trailers.

    Make identification follow the part after unpacking

    The packing list should connect package identifiers to item references, drawing revisions and quantities. Where left and right parts are similar, include handedness in the identification plan. If a matched set is split between packages, make that relationship explicit in the list.

    Agree where identification is allowed. Temporary labels should not interfere with a mating surface or create an unresolved cleaning requirement before customer processing. Ask how item identity will be preserved if the outer wrapping is removed for receiving inspection. Purchased hardware, when included, needs its own clear count and item reference.

    A useful receiving record captures the package identifier, the component item, quantity and any discrepancy. It should use the same references as the order and approved drawings.

    Review package and handling information before dispatch

    Request the agreed package count, external dimensions and gross and net weights when available. Your logistics team needs the actual shipment information to review transport and site handling arrangements. Early estimates should be identified as estimates and replaced with confirmed data before the relevant booking or approval step.

    Ask for packing photographs that show the overall package and the agreed protection details before they become concealed. Photographs can support a release review, but they do not establish the strength of the package or replace a required check. Confirm who approves the final arrangement and how any changes will be communicated.

    Transport restraint, stacking, lifting and container loading must be assessed for the actual cargo and route. Do not infer handling permissions from a generic product or packing image.

    Check wood packaging requirements with the destination in mind

    The IPPC describes ISPM 15 as addressing pest risks associated with raw-wood packaging in international trade, including dunnage, while excluding wood processed in a way that makes it free from pests, such as plywood. Review the official IPPC adopted standards page for the standard and current reference.

    When wood is proposed, identify the actual packaging materials, including any solid-wood supports or dunnage. Have the supplier and your broker or relevant authority confirm applicable destination requirements and the evidence needed. A plywood panel in a package does not describe every material in that package. This article does not confirm compliance for any specific shipment or claim that THYH has approved a particular packaging design.

    Connect dispatch records to a practical receiving checklist

    Before release, reconcile the final packing list with the purchase order and agreed component scope. Check that excluded hardware has not been counted as supplied, that matched sets are complete and that the package documentation uses the released drawing revisions. Agree which inspection or material records accompany the shipment.

    • Record package condition before opening, following your receiving procedure.
    • Match package identifiers and item quantities to the packing list.
    • Check the protected critical features and record any apparent discrepancy.
    • Keep the relevant package and component references with receiving photographs.
    • Resolve discrepancies through the agreed supplier communication process before affected parts enter assembly.

    Include your packing requirements with the initial component RFQ. THYH can review them alongside the drawings and quote the agreed packing scope for panels, floor fabrications and supporting metal parts.

    Frequently Asked Questions

    Should dump trailer components be packed by trailer set or by part type?

    Either approach can be considered. Choose it according to receiving, inventory and assembly needs, then agree how quantities, matched parts and package identifiers will be recorded.

    Does plastic wrapping alone define corrosion protection?

    No. Specify the intended storage and transit conditions, required protection and compatibility with later processing. The protection method and its acceptance requirements must be agreed for the order.

    Does a packing photograph prove that a shipment meets all requirements?

    No. It can show visible packing details, but it does not establish package strength, cargo restraint or destination compliance. Review the actual specification and required records.

    Is all wood packaging covered in the same way by ISPM 15?

    No. The standard distinguishes raw wood from certain processed wood materials. Check every relevant packaging component and confirm applicable destination requirements with the appropriate parties.

    Related Reading & Components

    Sources & Further Reading

    These references support the specific technical context discussed above; they do not certify our components or replace project-specific design review.
  • Custom Trailer Brackets and Welded Supports: What a Supplier Needs to Quote

    Custom Trailer Brackets and Welded Supports: What a Supplier Needs to Quote

    COMPONENTS FOR CUSTOMER ASSEMBLY · QINGDAO, CHINAandywang@thyhtrailerparts.com
    Home / Blog / Custom Trailer Brackets and Welded Supports: What a Supplier Needs to Quote
    TRAILER PARTS / BUYER GUIDES

    Custom Trailer Brackets and Welded Supports: What a Supplier Needs to Quote

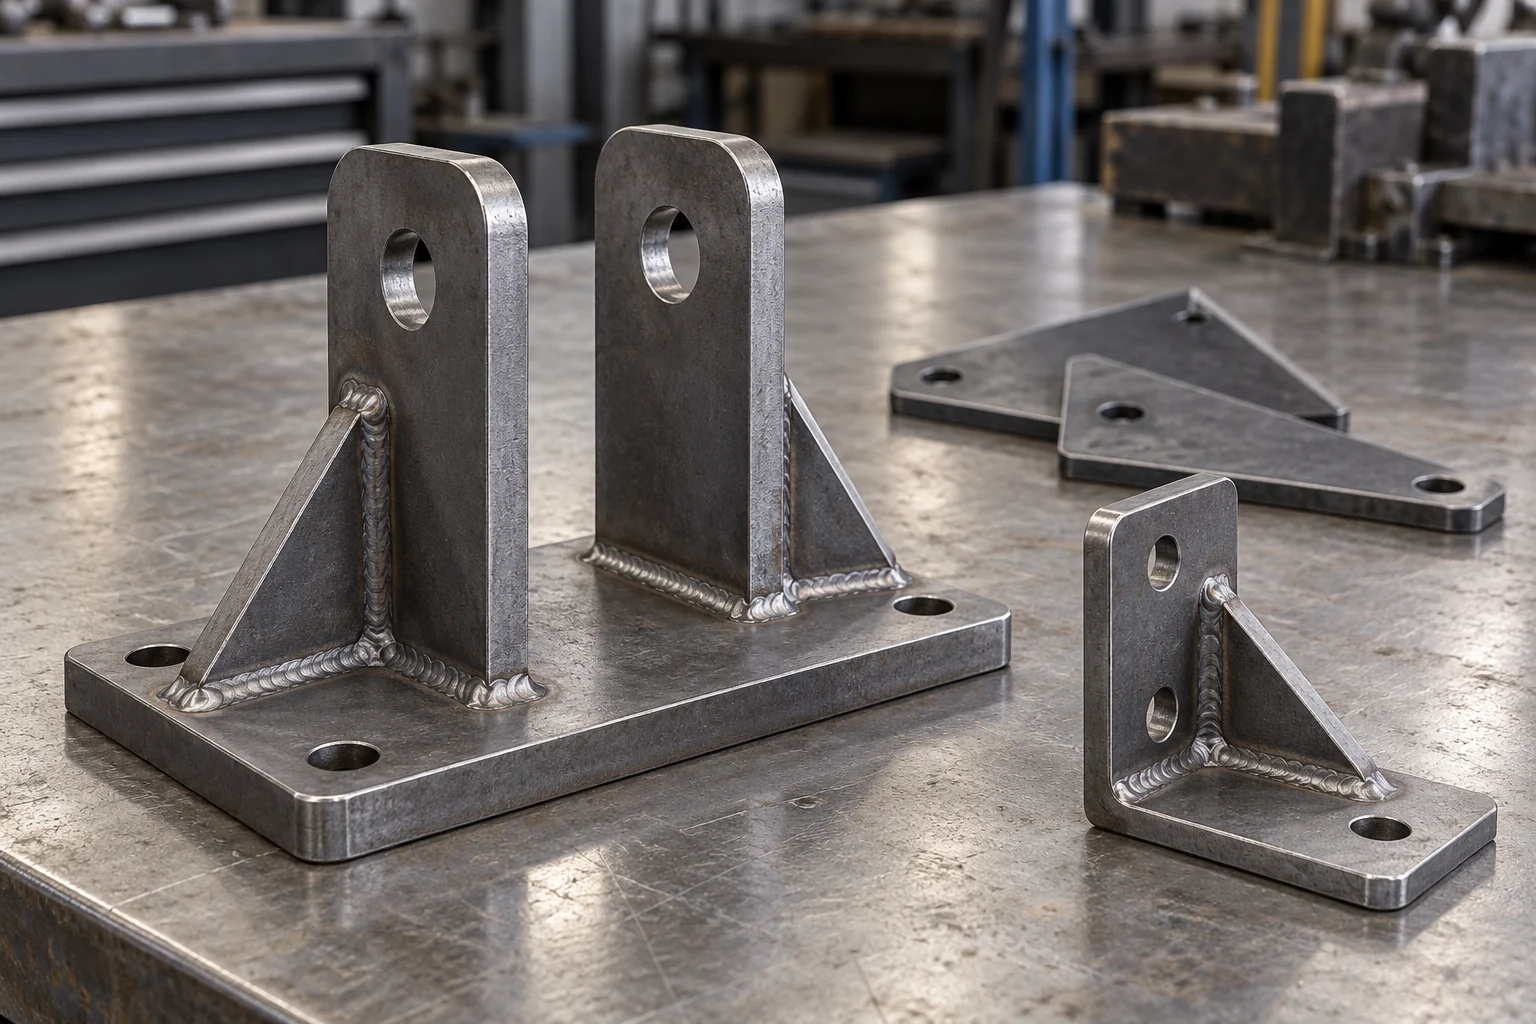
    Custom steel trailer mounting brackets and welded gusset supports
    Component concept for sourcing discussion. Final geometry, material and included items follow the agreed drawings.

    Explain what the bracket connects

    A mounting bracket may be a small line item, but its hole position or mating face can determine whether the larger assembly fits. Begin the inquiry with an assembly view that shows what the bracket connects and where it sits. Include the nearby geometry needed to understand access, clearance and the intended connection.

    Use a functional description such as body support bracket, mounting plate or gusseted support, then connect it to an item reference and drawing. The name alone does not define a design. THYH supplies custom metal fabrications to agreed drawings; the required loading, service conditions and design validation must be established for the customer’s actual trailer.

    Separate part supply from hardware supply

    A drawing of two bracket ears around a pin can be interpreted in several ways. The supplier may be asked to provide only the welded ears, the ears with finished holes, or a larger assembly including the pin and bushes. List these items in the bill of materials and state the supply responsibility for each one.

    Item or operationScope questionUseful RFQ detail
    Cut and formed bracketLoose part or welded fabrication?Finished drawing and quantity
    Holes and locating facesAs-cut, machined or customer-finished?Acceptance condition and references
    Pins, bushes and fastenersIncluded, customer-supplied or excluded?Separate item references
    Gussets and backing platesIncluded in this assembly?Welded positions and joint details
    FinishBare, protected or externally coated?Required finish specification

    Use the same scope when comparing quotations. A lower price for unfinished holes or excluded hardware is not directly comparable with a fully specified assembly.

    Define holes from the features that matter

    For a bracket with paired ears, show how the holes relate to each other and to the mounting base. Include the required fit, alignment and locating references where the design needs them. Diameter alone does not define the relationship between the two holes or the position of the pin axis in the larger assembly.

    Explain whether slots provide adjustment, assembly clearance or another intended function. Do not let an elongated hole substitute for an unresolved drawing issue. The supplier should be able to identify which features are critical and which dimensions are general fabrication requirements. If a mating item is customer-supplied, provide its interface drawing or agreed checking data.

    Generic agricultural dump trailer application reference
    Application reference: agricultural / construction dump trailer. THYH supplies metal components for customer assembly, not complete trailers.

    Specify material and formed geometry together

    List the material grade and thickness for each item. A welded support may contain a base plate, formed bracket and separate gussets with different requirements. State whether material substitution is permitted and how approval must be obtained. Similar appearance or nominal strength does not establish equivalence for the intended design.

    For bent parts, show the final section, bend geometry and dimensions that establish fit. Identify the relevant inner or outer faces. If machining follows forming or welding, distinguish the machining requirement from the earlier blank geometry so the quote includes the necessary operations and inspection stage.

    Review weld access and the fabrication sequence

    Supply weld symbols or other unambiguous joint details, including the applicable acceptance requirements. A cosmetic view of a welded bracket does not define weld size, extent or inspection. Identify surfaces that must remain clear for a mating part or later processing.

    TWI explains that welding direction and sequence can be used to manage distortion. For procurement, the useful action is to ask how the proposed fabrication route will preserve the drawing-defined interfaces. This is not a reason to prescribe a universal sequence for every bracket. The appropriate approach depends on the actual geometry and joining requirements. Read TWI’s explanation.

    Ask the supplier to flag inaccessible joints or conflicting requirements before production. Agree any drawing changes through a documented approval process.

    Plan finishing and inspection around the mating features

    Identify holes, threads, contact faces and customer weld areas that need an agreed protection or masking condition. Specify the finish and acceptance requirements rather than relying on a photograph or a color name. Surface treatments included in THYH quotations are arranged through external suppliers; the scope is confirmed for each project.

    Define the critical measurements and their condition: for example, the agreed finished bracket geometry rather than the shape while clamped in a welding fixture. Specify any assembly check separately from dimensional inspection. The RFQ should describe what is to be checked, how acceptance is determined and what records are required; it should not assume that every possible check is included by default.

    Use the first approved part to control repeat orders

    If an initial sample or first-article review is required, agree its deliverables and approval point before the order is released. Record the drawing revision, material, included hardware, inspection results and approved finish. A sample approval should not leave an unresolved difference between the sample and the production drawing.

    For repeat orders, send the current revision and highlight changes affecting holes, welds, material, quantities or packaging. Ask for confirmation that superseded data has been replaced. Keeping the quotation package consistent makes it easier to compare repeat pricing and investigate any receiving discrepancy.

    Start with the brackets and supports category and send the component plus assembly information. A clear package lets THYH review the required cut, formed, machined and welded operations and return a quotation with explicit inclusions.

    Frequently Asked Questions

    Can a bracket be quoted from a photograph?

    A photograph can support an initial discussion, but a confirmed custom fabrication quote needs drawing-defined geometry, material, quantity and other applicable requirements.

    Are pins and bushes automatically included with a welded bracket?

    No. List purchased hardware separately and state whether it is supplied by the fabricator, provided by the customer or excluded from the order.

    Can THYH assign a load rating from the bracket image?

    No. Required loading and design validation depend on the actual application. A generic image does not establish a load rating or engineering approval.

    Should machined holes be identified separately in the RFQ?

    Yes. State the required finished condition, dimensions, fit and inspection stage so machining and verification are included in the quoted scope.

    Related Reading & Components

    Sources & Further Reading

    These references support the specific technical context discussed above; they do not certify our components or replace project-specific design review.
  • Dump Trailer Side Panels: How to Order a Matched Left and Right Set

    Dump Trailer Side Panels: How to Order a Matched Left and Right Set

    COMPONENTS FOR CUSTOMER ASSEMBLY · QINGDAO, CHINAandywang@thyhtrailerparts.com
    Home / Blog / Dump Trailer Side Panels: How to Order a Matched Left and Right Set
    TRAILER PARTS / BUYER GUIDES

    Dump Trailer Side Panels: How to Order a Matched Left and Right Set

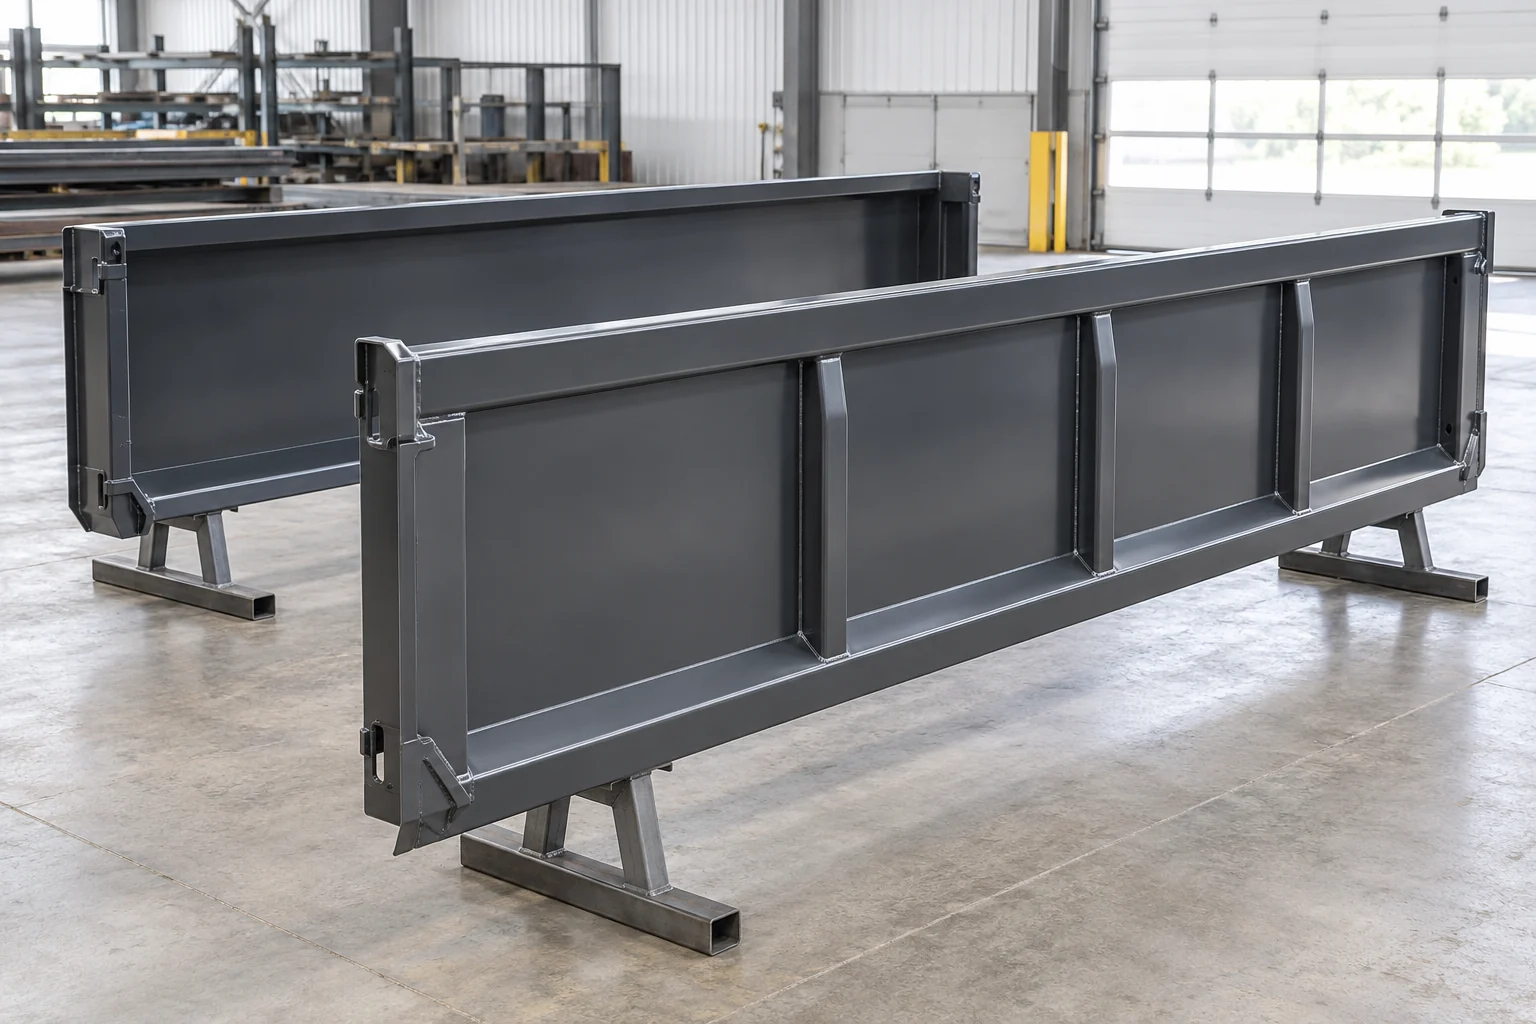
    Matched left and right fabricated dump trailer side panels
    Component concept for sourcing discussion. Final geometry, material and included items follow the agreed drawings.

    Start with a matched assembly, then separate the panels

    A sidewall can look correct in a photograph and still arrive with a mounting feature on the wrong face. The buyer needs a matched assembly definition: where each side sits, which face points inward and how it meets the floor, front wall and rear opening. A product image helps explain the application, but it cannot replace those relationships.

    This guide concerns made-to-drawing dump trailer side panels for customer assembly. It does not describe a universal replacement panel or an approved load-bearing design. Use the assembly drawing to establish the requirements, then issue separate part drawings for the left and right fabrications.

    Make handedness impossible to misread

    State the viewing convention on the drawing, such as left and right when looking forward from the rear of the trailer. Include an orientation view showing the front, rear and inner face. If your organization uses another convention, define it explicitly rather than relying on a supplier to infer it.

    Give each handed part a unique item reference, even when the main plate shape is similar. A mirrored rib arrangement does not prove that holes, tabs or interfaces are also mirrored. Confirm the quantity of individual panels as well as the quantity of sets; purchasing ten sets should not be interpreted as ten individual walls.

    RFQ fieldWhat to defineQuestion it resolves
    OrientationForward direction, inside face and left/right conventionWhich wall is this?
    Part identitySeparate item references and current revisionsWhich drawing applies?
    QuantityPieces per hand and number of matched setsHow many parts are required?
    Assembly edgesFloor, bulkhead and tailgate mating geometryWhat must line up?

    Define the formed profile and top rail

    Specify material grade, plate thickness and the finished cross-section. For folded edges, show the intended radii, angles and reference dimensions. Distinguish a rail formed from the panel itself from a separate rail welded onto it; those are different fabrication scopes even when the outside silhouette looks similar.

    State where overall height and length are measured. A dimension to the outside of a folded rail is different from the usable internal body dimension. If adjacent parts require a particular straight edge or reference surface, identify that feature and its acceptance requirement. Avoid applying a tight blanket tolerance to every visible surface when only selected interfaces drive assembly.

    Generic agricultural dump trailer application reference
    Application reference: agricultural / construction dump trailer. THYH supplies metal components for customer assembly, not complete trailers.

    Locate reinforcement from common references

    Show each rib, stiffener, gusset and attachment feature from agreed references. Measuring successive ribs from one another can leave the last interface unclear when the assembly actually depends on a common front or rear reference. The drawing should make the intended locating method understandable to both fabrication and inspection teams.

    Indicate which reinforcements belong in the quoted panel and which remain on the customer assembly. Where welds are specified, include the applicable joint details and acceptance requirements. Ask the fabricator to review access and sequence. TWI notes that welding technique and sequence influence distortion; that supports discussing the manufacturing route, rather than assuming the cut plate determines the final wall shape. See TWI’s fabrication guidance.

    Review the edges that meet other body components

    Provide the mating floor, front bulkhead and rear opening information needed to understand the sidewall. A side panel drawing alone may not reveal whether an edge is intended for a lap joint, a butt joint, a bolted connection or a customer weld preparation. Identify the required supply condition at each joint.

    • Confirm whether holes are finished features, pilot features or omitted for customer processing.
    • Identify tabs, slots and locating features that must align with other components.
    • List any weld-free or coating-free areas required for final assembly.
    • Clarify whether the rear edge interfaces with the tailgate structure or a separate rear frame.

    Changes to one mating component should trigger a review of the affected panel revision before production is released.

    Agree the inspection condition and panel finish

    State whether dimensions are accepted after forming, after welding, after surface treatment or at another agreed stage. For a long panel, the support arrangement and measurement references can affect how a straightness or shape check is understood. Record the setup needed for critical checks and the report format expected with the order.

    If the panels will be painted or coated before customer assembly, identify protected interfaces, handling areas and the agreed appearance requirement. Surface treatments for THYH projects are arranged through external suppliers where included in the quotation. Finish availability and acceptance criteria are confirmed for the actual part; a color image is not a coating specification.

    Send one coordinated package for quotation and receiving

    A useful RFQ includes the assembly view, both handed drawings, material requirements, bill of materials, quantities, weld details, finish and selected inspection points. Add a simple list of exclusions so purchased fittings or customer-installed items do not silently become part of the expected delivery.

    Plan identification and protection before shipment. Ask how left and right panels, matched sets and revisions will be distinguished after unpacking. Agree where temporary identification may be placed and which visible or mating surfaces need protection. Receiving staff should be able to reconcile the delivered pieces with the packing list without guessing from panel appearance.

    For the wider body package, use the dump trailer body parts RFQ checklist alongside the panel drawings. THYH can review drawing-based sidewall fabrications and quote the agreed component scope for your team’s assembly.

    Frequently Asked Questions

    Can the same drawing be used for both trailer side panels?

    Only when it explicitly defines both handed parts and all mirrored or non-mirrored features. Separate item references and clear orientation views help prevent ambiguity.

    Does a side panel photograph establish compatibility?

    No. Compatibility depends on the agreed geometry, material, mating interfaces and assembly requirements. Provide drawings of the panel and relevant adjoining components.

    Should dimensions be inspected before or after welding?

    Define the required acceptance stage for each critical feature. A pre-weld measurement does not by itself establish the geometry of the finished welded panel.

    Can side panels be purchased without the rest of the trailer?

    THYH quotes drawing-defined metal components for customer assembly. Specify whether you need individual walls, matched pairs or a coordinated body component package.

    Related Reading & Components

    Sources & Further Reading

    These references support the specific technical context discussed above; they do not certify our components or replace project-specific design review.
  • Dump Trailer Tailgates: Hinge, Latch and Fit Checklist

    Dump Trailer Tailgates: Hinge, Latch and Fit Checklist

    COMPONENTS FOR CUSTOMER ASSEMBLY · QINGDAO, CHINAandywang@thyhtrailerparts.com
    Home / Blog / Dump Trailer Tailgates: Hinge, Latch and Fit Checklist
    TRAILER PARTS / BUYER GUIDES

    Dump Trailer Tailgates: Hinge, Latch and Fit Checklist

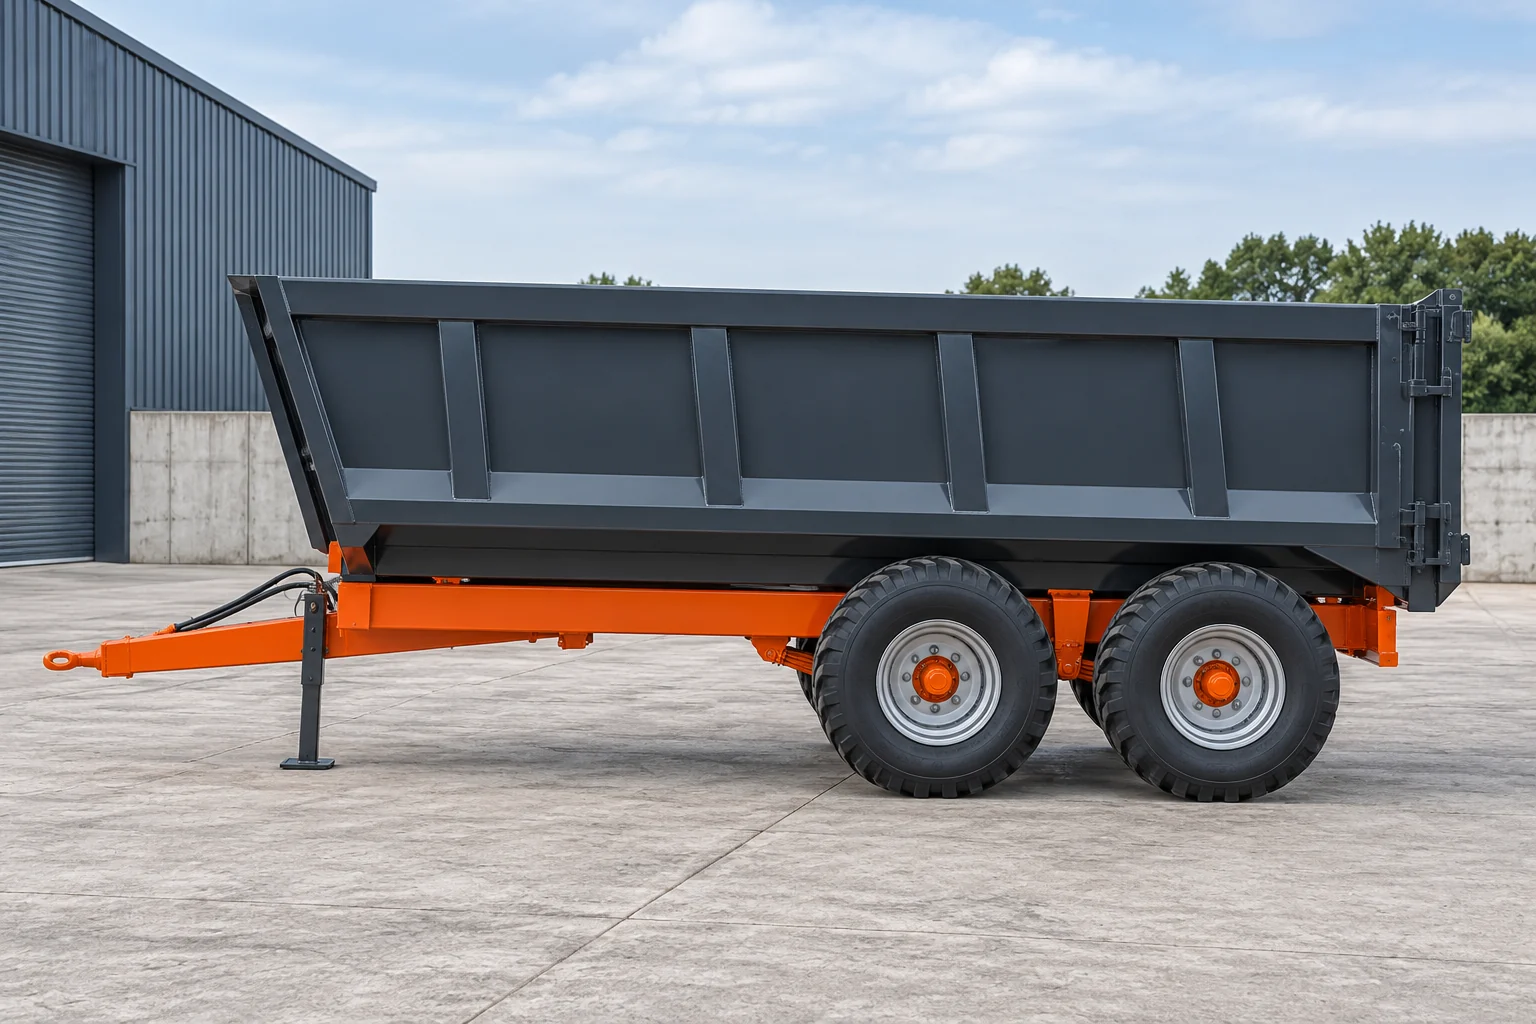
    Generic agricultural dump trailer application, rear view
    Application reference: agricultural / construction dump trailer. THYH supplies metal components for customer assembly, not complete trailers.

    The tailgate is more than a rectangular panel

    A rear gate is easy to recognize in an application photograph. It is harder to specify from that photograph. Two similar-looking gates may connect to different hinge brackets, latch arrangements, body openings or customer-supplied actuators. Their outer dimensions may be close while their mating interfaces differ.

    When sourcing a dump trailer rear panel or tailgate fabrication, send the surrounding body geometry as well as the gate drawing. The supplier needs to understand what is fabricated, what is supplied as purchased hardware and what your assembly team will install later.

    This checklist addresses procurement and fabrication interfaces. It does not establish a gate load capacity, a hydraulic design or a safe operating procedure. Those are separate design and validation matters.

    Record the interfaces in one place

    InterfaceWhat the drawing should identifyWhat to clarify in the quote
    Body openingReference geometry, corner relationships and datumsWhether mating body parts are included
    HingesAxis, bracket locations, bores and pin requirementsFabricated brackets only or hardware too
    LatchesMounting positions and counterpart geometryLatch supply and installation responsibility
    ClosureClearance, stops and any seal interfacesAny agreed fit or functional check
    FinishCoated surfaces and protected fitsInspection stage and finishing scope

    1. Reference the gate to the body opening

    Begin with the opening that receives the gate. Show the relevant body rails, corners and connection faces. Identify which drawing controls the assembly if dimensions appear in more than one file. Revision control matters particularly when the body and gate are sourced as separate packages.

    Then show the gate envelope and the intended relationship to the opening. Use the design’s actual clearance requirements rather than a generic gap copied from another trailer. If the supplied rear panel is only one element of a closure system, list the other elements and the party responsible for them.

    For a combined order, the body component collection can be discussed as a coordinated package. That does not remove the need for an itemized bill of materials and agreed acceptance requirements.

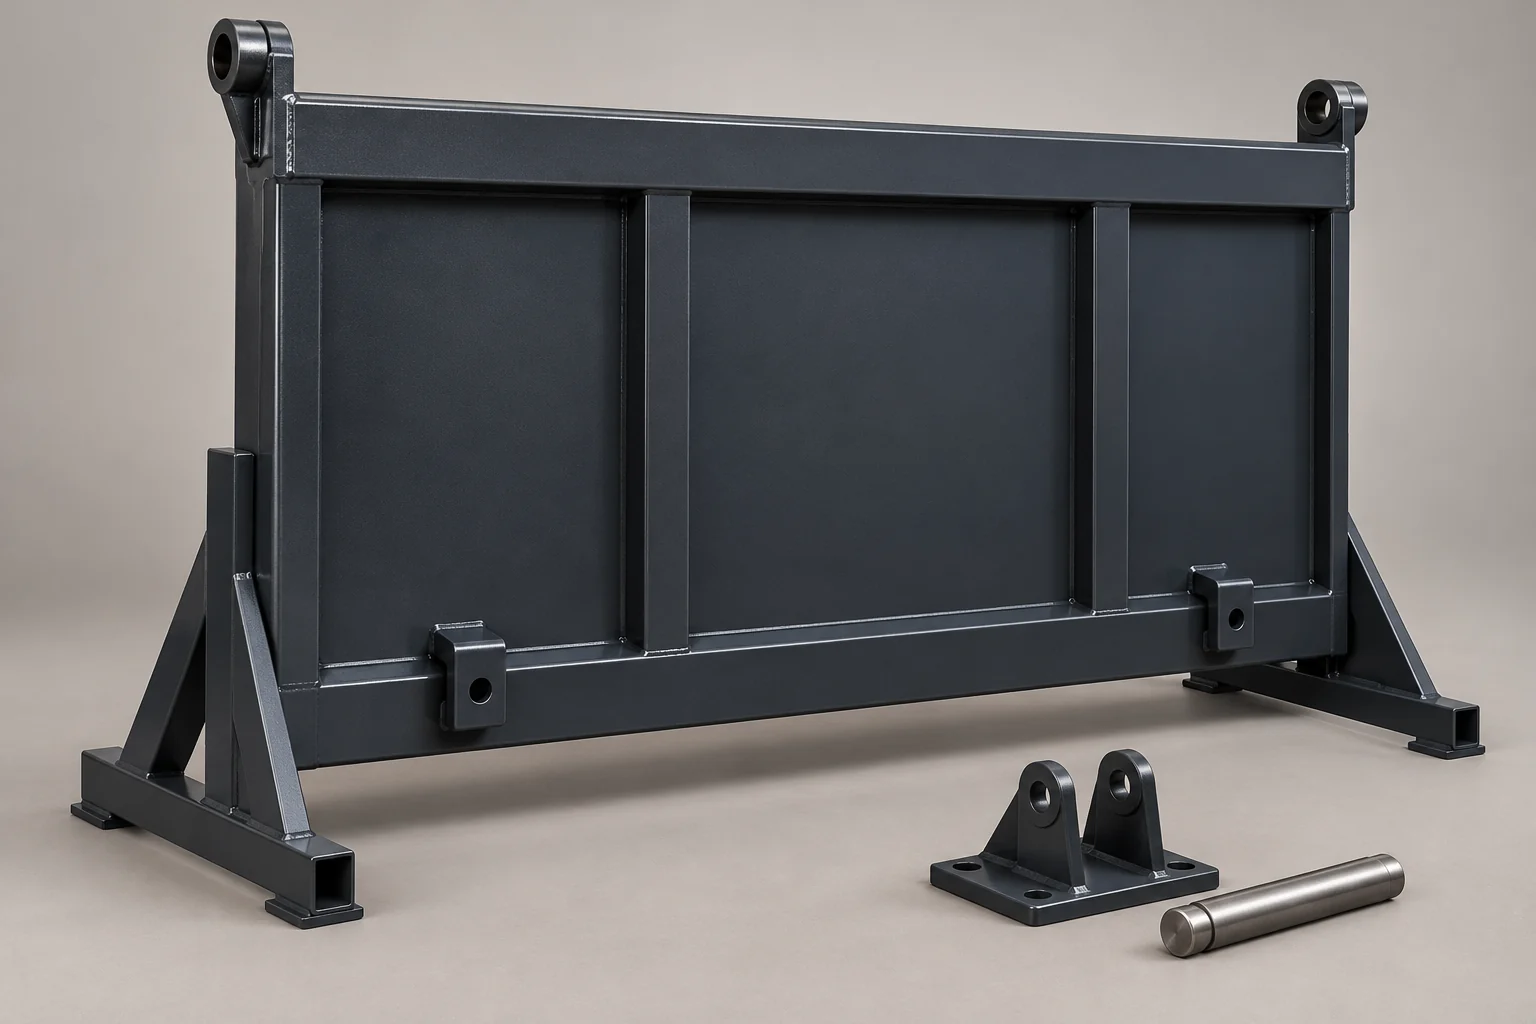
    tailgate detail illustration for a dump trailer parts specification
    Component concept for sourcing discussion. Final geometry, material and included items follow the agreed drawings.

    2. Identify the hinge axis and mating hardware

    A hinge lug is not defined by its visible shape alone. The drawing should locate the intended axis and show how the gate-side and body-side features relate. Provide the bore, pin and mating-feature requirements that the design needs, including the applicable datums.

    State whether the order includes fabricated hinge brackets, machined features, pins, bushes or an assembled hinge arrangement. A quote for welded gate lugs should not be treated as an offer for every item needed to complete the hinge.

    If machining is required after welding, identify the finished feature and inspection requirement. The supplier can then review the manufacturing route against the actual component. Do not assume that a cut or as-welded opening is equivalent to a specified finished fit.

    3. Show both halves of the latch interface

    The latch-side requirement includes more than the tab welded to the gate. Share the counterpart geometry and mounting relationship where it affects fabrication. Identify whether the supplier provides the latch hardware, only fabricates its mounting interfaces, or leaves the whole system to the customer.

    Include any stops, striker interfaces or seal-support details that belong to the order. Where an actuator is part of the customer’s design, provide the required envelope and connection information without assuming the fabricator is responsible for actuator selection or system approval.

    Make the drawing and quotation agree on the supply boundary. If an item is shown for reference only, label it accordingly so it is not accidentally included in one bid and excluded from another.

    4. Inspect the gate in the agreed fabricated state

    Welding can alter panel geometry and the position of attached features. TWI identifies shrinkage, angular distortion and bowing among the possible forms of welding distortion. This is a reason to specify the gate’s acceptance condition and inspection references, not a reason to assume that every welded gate will have the same result. Read the TWI overview.

    Define the outer dimensions, diagonals or interface locations that need to be recorded for your project. State whether requirements apply before or after finishing. If the design needs a sample fit check, define the mating parts, the method and the acceptance criteria in the order.

    A dimensional report and a functional check are different deliverables. Request each explicitly where needed. Do not assume a photograph of the gate proves alignment, a finished fit or the performance of a complete closure system.

    5. Account for finish and assembly responsibility

    Identify surfaces that receive coating and those that need protection or masking. For pin-and-bore fits or other mating features, the specification should make clear which finished condition must be achieved. Finishing decisions should be reviewed with the component geometry rather than left until packing.

    THYH Trailer Parts can discuss drawing-based cutting, forming, machining and welding for the specified fabrication. Painting, powder coating and galvanizing are arranged through external suppliers where agreed. Material, process and inspection coverage remain order-specific.

    Your assembly team should know what work remains after delivery: fitting purchased hardware, assembling interfaces, completing the body or performing an agreed system validation. Record those responsibilities before the purchase order is released.

    What to send with a tailgate inquiry

    • The current gate drawing and the relevant rear body assembly.
    • Part numbers, drawing revisions and required quantities.
    • Material grade, thickness, reinforcement and weld details.
    • Hinge-axis and latch-interface references.
    • Included hardware, customer-supplied items and explicit exclusions.
    • Finished-state dimensions, inspection records and any sample fit-check requirement.
    • Surface treatment, protected features, marking and packing instructions.

    A useful supplier response identifies the manufacturing scope, records open questions and separates optional work from the base offer. That makes the review more reliable than comparing a short price against a broad description such as “rear door complete.”

    Frequently Asked Questions

    Can the tailgate be supplied separately from the body?

    Yes, it can be requested as a separate fabrication. Supply the mating body geometry and interface requirements, and confirm which hardware and checks are included.

    Does a correct gate width guarantee that it will fit?

    No. The intended fit also depends on the body opening, hinge and latch relationships, clearances, fabricated condition and other requirements in the approved assembly design.

    Should pins, bushes and latches be listed in the bill of materials?

    Yes. List them and state whether they are supplier-provided, customer-provided or reference-only. A drawing of an interface does not automatically include its purchased hardware.

    Is a functional check the same as a dimensional inspection?

    No. A dimensional inspection records agreed features; a functional or fit check requires its own setup and acceptance criteria. Include the required checks explicitly in the order.

    Related Reading & Components

    Sources & Further Reading

    These references support the specific technical context discussed above; they do not certify our components or replace project-specific design review.
  • Dump Trailer Floor Panels: What to Specify Beyond Thickness

    Dump Trailer Floor Panels: What to Specify Beyond Thickness

    COMPONENTS FOR CUSTOMER ASSEMBLY · QINGDAO, CHINAandywang@thyhtrailerparts.com
    Home / Blog / Dump Trailer Floor Panels: What to Specify Beyond Thickness
    TRAILER PARTS / BUYER GUIDES

    Dump Trailer Floor Panels: What to Specify Beyond Thickness

    Generic agricultural dump trailer application, side view
    Application reference: agricultural / construction dump trailer. THYH supplies metal components for customer assembly, not complete trailers.

    Why thickness is only the starting point

    Buyers often begin a dump trailer floor inquiry with a single question: “What thickness should the bottom plate be?” It is a useful starting point, but it is not a complete manufacturing specification. The same plate thickness can appear in floors with different spans, supporting members, attachment details and service conditions.

    For a drawing-based component order, the fabricator needs to know what is being manufactured and which requirements must be verified. The design team determines the structural arrangement and any required validation. The procurement team’s job is to transmit that design clearly so different quotations describe the same floor.

    This article explains the specification fields to review when sourcing dump trailer floor panels and floor assemblies. It does not prescribe a universal thickness, steel grade or working load.

    Compare the specification fields together

    Specification fieldQuestion to resolveRFQ document
    PlateWhich grade, standard and thickness apply?Material note and part drawing
    ReinforcementWhich profiles, spacing and end details are required?Underside layout and sections
    ConnectionsHow does the floor meet sidewalls and other structures?Assembly interfaces and datums
    WeldingWhich joints and acceptance requirements apply?Weld details and inspection scope
    DimensionsWhich values apply after fabrication and finish?Finished-state inspection drawing
    DeliveryWhat surface condition, marking and packing are needed?Finish and packing requirements

    1. Name the material without assuming equivalence

    Write the specified grade and applicable material standard on the drawing or purchase specification. “Steel floor” leaves a major requirement undefined. If a different material is proposed, request the actual grade and supporting documentation for design review rather than accepting a substitution based only on thickness or appearance.

    When wear plate is part of the design, its processing requirements also deserve attention. For example, SSAB publishes product-specific guidance for welding its Hardox wear plate, including joint preparation, consumables, preheating and heat input. That guidance is explicitly limited to the manufacturer’s relevant products; it should not be copied as a universal procedure for other steels. Read SSAB’s stated scope and considerations.

    A named material in a buyer’s drawing is not a claim that a supplier routinely stocks that material. Confirm procurement, processing and documentation availability for the order.

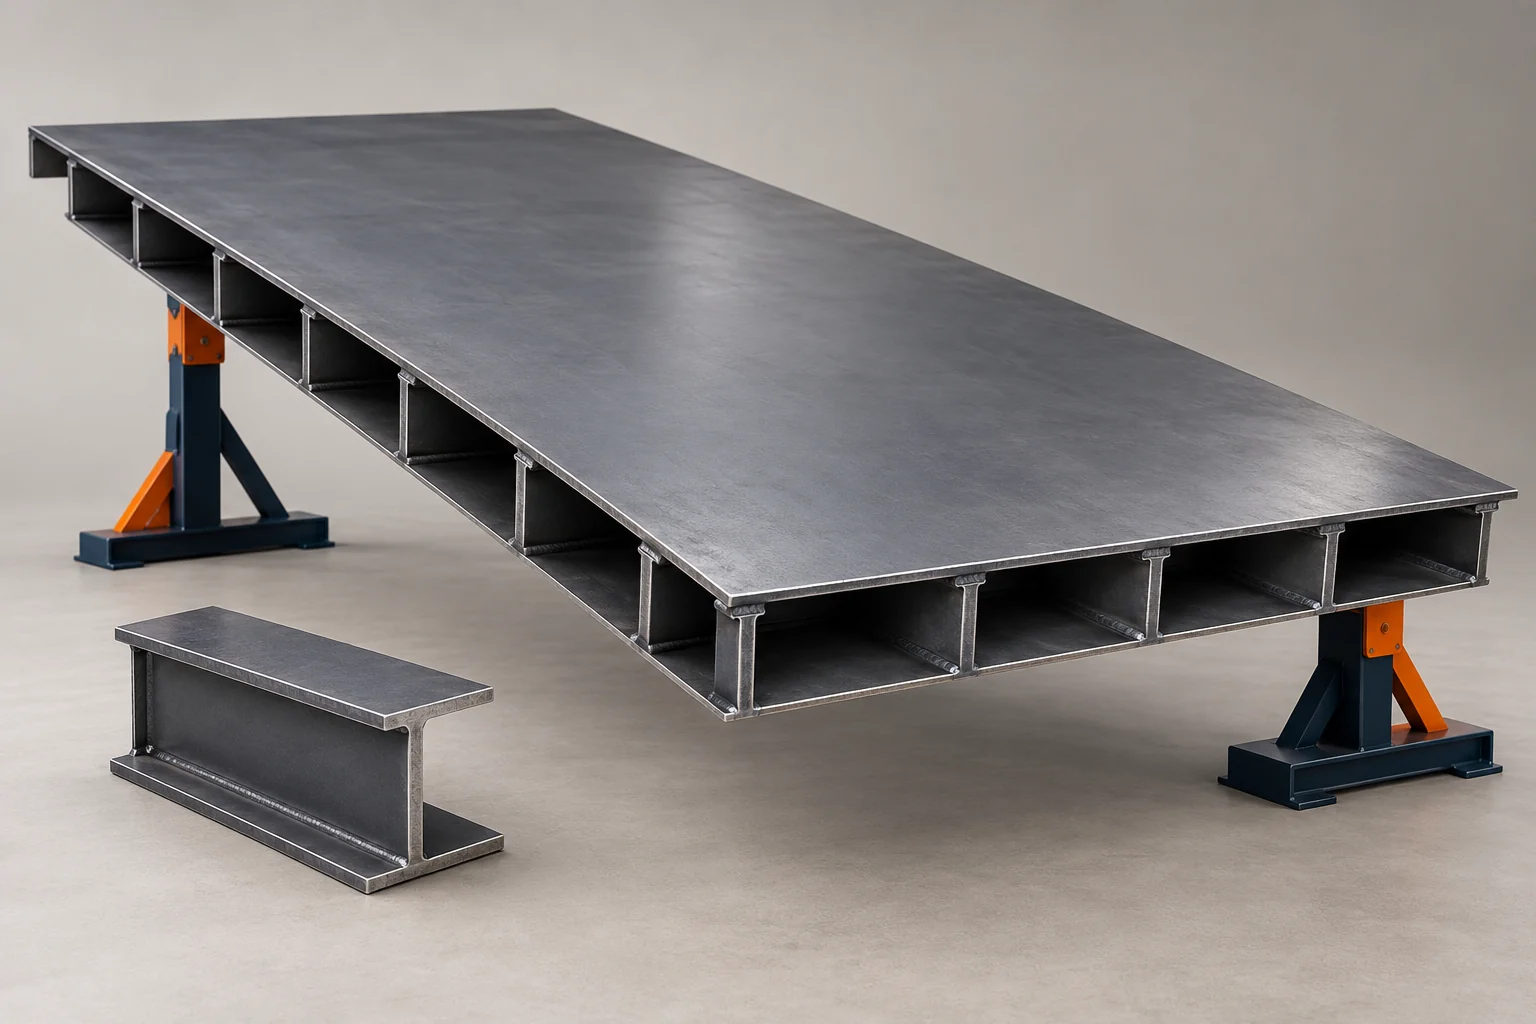
    floor detail illustration for a dump trailer parts specification
    Component concept for sourcing discussion. Final geometry, material and included items follow the agreed drawings.

    2. Treat underside reinforcement as part of the floor

    A plate-only quotation and a reinforced-floor quotation are not directly comparable. Show the underside arrangement, profile sections, orientation and member end details. Include the positions at which reinforcement connects to rails or other interfaces defined in your assembly.

    Identify whether the supplier fabricates the complete floor assembly or supplies the plate and reinforcing components separately. That distinction changes the manufacturing sequence, inspection references, packing arrangement and work remaining for the customer.

    If a visual rendering accompanies the RFQ, use it to explain orientation only. The controlled drawings should define the profiles and spacing. An illustration cannot determine whether a member is a channel, a closed section or a folded plate fabrication.

    3. Define the sidewall and attachment interfaces

    The floor’s outer envelope is not the only relationship that matters. Sidewall angle, bottom flanges, front corners and the rear opening can affect how the body fits together. State which surfaces or features establish the common reference system.

    For a coordinated package, send the body assembly and bill of materials alongside the floor drawing. Identify any parts that will be welded or bolted to the floor later. If hole positions relate to the finished assembly, make that relationship explicit instead of leaving the supplier to measure from a convenient cut edge.

    Also distinguish permanent attachment features from temporary handling provisions. Lifting points or transport supports require an agreed scope; they should not be inferred from a product picture.

    4. Agree the welded condition and dimensional checks

    Welding introduces a thermal cycle that can change geometry. TWI describes transverse and longitudinal shrinkage, angular distortion, bowing and other forms of distortion associated with welded fabrication. This supports a practical purchasing question: which dimensions must be checked after the floor has been welded? See TWI’s overview of distortion types.

    Specify the finished-state envelope, the datums used for measurement and any agreed flatness or interface requirements. Do not use “perfectly flat” as a substitute for a measurable acceptance requirement. Where support conditions influence measurement, identify the inspection setup with the supplier.

    The manufacturing route may include fixturing and a defined weld sequence. Those measures need to fit the actual joint design and material; adding clamps is not a universal solution. Ask how the agreed critical features will be inspected rather than prescribing a process without reviewing the fabrication.

    5. Describe the surface condition and finishing scope

    State whether the floor is delivered as fabricated, prepared for a customer-applied finish, or supplied with an agreed coating. Identify the top surface, underside, edges and mating areas separately where their requirements differ.

    For coated parts, define the coating system, preparation, protected areas and documentation that matter to your build. A color description alone does not define the full finishing scope. If your team will weld the floor into a larger assembly, discuss the required delivery condition before the finish is selected.

    THYH Trailer Parts coordinates painting, powder coating, galvanizing and other agreed surface treatments through external suppliers. These are not represented as in-house coating operations. Availability and the applicable specification are confirmed with the order.

    A receiving checklist for floor fabrications

    • Match the part number and drawing revision to the purchase order.
    • Confirm the material documentation required by the order.
    • Compare the reinforcement arrangement with the approved underside layout.
    • Review the recorded critical dimensions and any agreed weld inspection documents.
    • Check the specified surface condition and protection of mating interfaces.
    • Identify transport damage and discrepancies before the component enters assembly.

    This is an illustrative receiving checklist, not a replacement for the project’s inspection or engineering requirements. Agree additional checks where the design or intended duty requires them.

    Frequently Asked Questions

    Is a thicker dump trailer floor always the better choice?

    Thickness alone is not a complete selection rule. Material, support arrangement, connections, intended duty and the complete design must be considered together by the responsible design team.

    Should I quote the bottom plate and reinforcing members separately?

    You can request either loose components or a welded floor fabrication. Identify the supply condition for every item so quotations and the remaining customer assembly work are comparable.

    Can a wear-resistant grade be substituted for ordinary steel?

    Do not assume equivalence. The proposed material and its processing requirements need review against the design. Record any accepted substitution in the controlled drawing and order documents.

    Which dimensions should be inspected?

    Identify the dimensions and interfaces that matter to the assembly, their datums and the condition in which they apply. Agree the actual dimensional and weld inspection scope before production.

    Related Reading & Components

    Sources & Further Reading

    These references support the specific technical context discussed above; they do not certify our components or replace project-specific design review.
  • Dump Trailer Body Parts: An RFQ Checklist for Buyers

    Dump Trailer Body Parts: An RFQ Checklist for Buyers

    COMPONENTS FOR CUSTOMER ASSEMBLY · QINGDAO, CHINAandywang@thyhtrailerparts.com
    Home / Blog / Dump Trailer Body Parts: An RFQ Checklist for Buyers
    TRAILER PARTS / BUYER GUIDES

    Dump Trailer Body Parts: An RFQ Checklist for Buyers

    Generic agricultural dump trailer application, front view
    Application reference: agricultural / construction dump trailer. THYH supplies metal components for customer assembly, not complete trailers.

    Start with the assembly, not a photograph

    A photograph helps identify the type of trailer you are building. It does not define the parts you want to buy. A reinforced sidewall may look similar to another sidewall while having different corner geometry, rail height, material, floor connections and tailgate clearances. A quotation based only on appearance leaves those decisions open.

    For agricultural or construction dump trailer body parts, begin with one assembly view showing the front, rear, left and right orientation. Add individual part drawings and a bill of materials. If the design is still being developed, identify the drawings that are preliminary. Ask the fabricator to list assumptions and exclusions rather than treating an early budget price as a production-ready offer.

    This guide concerns fabricated body components for customer assembly. Complete trailers, running gear, hydraulic systems and vehicle approval are separate scopes unless expressly included and accepted in an order.

    The body-parts RFQ at a glance

    InformationWhat to provideWhy it matters
    Assembly layoutOrientation, overall envelope and item referencesConnects individual parts to the intended build
    Bill of materialsPart number, revision, quantity per set and order quantityDefines exactly what is included
    MaterialGrade, standard, thickness and documentation needsPrevents an appearance-based substitution
    InterfacesDatums, holes, flanges, hinge axes and critical clearancesDefines fit at the customer’s assembly stage
    Supply conditionLoose, formed, welded, machined or finishedSeparates supplier work from customer work
    Release requirementsInspection records, marking, packing and destinationMakes offers easier to compare

    1. Divide the package into recognizable component groups

    Organize the request around the way the body will be assembled. Common groups are left and right side panels, a front bulkhead, a rear tailgate, a floor fabrication and brackets and supports. Include loading ramp components only if they are part of your design and procurement scope.

    Give each group an item reference. A purchasing description such as “one body set” is useful only when the drawing package defines that set. A simple quantity relationship prevents mistakes: show the quantity of each part per assembly and the number of assemblies ordered. Where left and right parts differ, assign separate part numbers even if the parts appear almost symmetrical.

    Also identify purchased hardware. Pins, bushes, latches, seals, fasteners and actuators should not disappear inside the word “tailgate.” List whether the supplier provides them, fabricates only the mounting interfaces, or leaves them entirely to your team.

    body package illustration for a dump trailer parts specification
    Component concept for sourcing discussion. Final geometry, material and included items follow the agreed drawings.

    2. Specify the condition in which each part should arrive

    A floor plate supplied loose is a different scope from a floor supplied with welded underside reinforcement. The same is true of a flat side panel, a formed side section and a reinforced welded sidewall. Use the drawing and quotation to identify the handover point.

    • Loose parts: define whether cutting, deburring and any hole finishing are included.
    • Formed parts: show the finished geometry, bend references and mating faces.
    • Welded subassemblies: identify joints, reference datums and the dimensions that apply after welding.
    • Finished components: state the coating specification and any masked interfaces.

    This is also the time to state whether temporary transport supports, identification labels or matched grouping are required. They should be agreed deliverables, not assumptions made after fabrication.

    3. Make assembly interfaces visible

    Overall length and width do not describe every fit requirement. For a sidewall, the important features may be the bottom flange, corner relationship and rear opening. For a tailgate, the important features may be the hinge axis and latch positions. For a bracket, a hole pattern may need to relate to a machined face rather than an untrimmed plate edge.

    Mark the functional datums and distinguish critical dimensions from general dimensions. State whether the acceptance requirement applies before or after welding and finishing. This helps the fabricator choose inspection references that match the way your assembly team will use the part.

    Where a sample fit check or an assembly trial is required, define its scope: which mating parts are included, who supplies them, what will be measured and what constitutes acceptance. A photograph of parts placed next to each other is not the same deliverable as a documented fit check.

    Welding-related thermal expansion and contraction can change geometry, as explained by TWI’s overview of distortion causes. Define the condition in which your critical dimensions are to be accepted.

    4. Compare inspection and documentation scope

    Ask every bidder to respond to the same document requirements. Depending on the project, these can include material documentation, a dimensional inspection record, welding inspection records and finishing documents. Confirm what will be supplied for the actual order rather than assuming that a general quality statement covers every component.

    A useful inspection request names the feature, reference and acceptance requirement. “Check the floor” is broad; “record the agreed floor envelope and attachment locations against the assembly datums” is easier to interpret. See our quality and inspection page for the types of requirements to define.

    There is no single inspection package that suits every trailer part. The right scope depends on the drawing, component function and customer requirements. Any load testing or system validation must be separately defined and accepted.

    5. Include packing and receiving requirements

    Long panels and finished interfaces can be difficult to identify after packing unless part references remain visible. Ask for a packing list that matches the bill of materials. Specify left/right marking, protection of machined or coated surfaces, and any need to group components by assembly.

    Provide the delivery destination and handling constraints early. A package arranged for one receiving method may be unsuitable for another. Packing dimensions, quantities, transport protection and unloading requirements need commercial agreement; do not assume a rendering demonstrates the final shipping arrangement.

    A practical example of a clearer request

    Ambiguous: “Please quote steel parts for a dump trailer like the picture.”

    Clearer: “Please quote the components listed in the attached bill of materials, using the stated drawing revisions. Supply the floor and sidewall fabrications in the assembly condition identified for each item. Quote finish, inspection documentation and packing as separate confirmed scope items. Identify exclusions and any features needing clarification.”

    This is an illustrative purchasing example, not a customer case study. The improvement comes from defining the scope, not from adding a promised delivery time or an arbitrary tolerance.

    Frequently Asked Questions

    Can I request only the body panels rather than a complete trailer?

    Yes. Specify the individual panels or fabrications in the bill of materials and identify the components your own team will supply or assemble. The agreed quotation determines the scope.

    Is a photograph enough for a production quotation?

    A photograph can identify the application, but production pricing needs drawings or equivalent dimensional and material requirements. Any assumptions in a preliminary quote should be recorded.

    What is the difference between a component package and a kit?

    A component package is an agreed group of supplied parts. Calling it a standardized kit would additionally imply a defined configuration and included items. Confirm the bill of materials and assembly requirements rather than relying on the label.

    Do the images establish dimensions or load capacity?

    No. Application and component illustrations identify the type of parts being discussed. Dimensions, interfaces, material and any design or validation requirements must come from the approved project documents.

    Related Reading & Components

    Sources & Further Reading

    These references support the specific technical context discussed above; they do not certify our components or replace project-specific design review.